Tuesday, May 21, 2013

White Chocolate Macadamia Milk Chocolate Brownies

If that title isn't a mouthful then I don't know what is!  But it describes these brownies perfectly because that is exactly what they are: a mouthful!  My favorite type of brownie is milk chocolate.  Sometimes I find the richer they are the less I can eat.  However, milk chocolate brownies are light and delicate and still taste great with a glass of milk!  If you have never had one, I highly suggest it.

I personally think white chocolate and macadamia nuts were made for each other.  Have you ever had one without the other?  It's just not the same.  They are soul mates.  I refuse to tear them apart.  But, when you add them together in cookies it makes them even better.  That is why this week I am adding them together in my brownies.  I am going to make them better than better! 

These brownies are everything.


White Chocolate Macadamia Milk Chocolate Brownies
a LindsayRoseDessert Original

8 oz milk chocolate chips
1 stick (8 tablespoons) unsalted butter, softened
3/4 cup flour
1/4 teaspoon baking powder
pinch of salt
1/2 cup sugar
2 eggs
1/2 cup white chocolate chips
1/2 cup chopped macadamia nuts


  • Preheat oven to 350 degrees.  Line a glass baking pan with aluminum foil and spray with non-stick cooking spray.
  • In a saucepan, on low heat, combine together the milk chocolate chips and butter.  Continuing stirring until completely melted.  Take off heat and let cool.
  • In a small bowl, mix together flour, baking powder, and salt.
  • In a large bowl, beat together sugar and eggs.  Stir in flour mixture just until combined.  Fold in chocolate mixture until all mixed together.  Stir in white chocolate chips and nuts. 
  • Bake for 20-25 minutes or until a toothpick inserted comes out clean.  Let cool before cutting.

Tip:
* If you are a coconut lover, try adding in coconut to these brownies for a hawaiian style brownie.
** Try making these brownies without white chocolate or nuts.  They are still DEEElicious!

If you have any other great ideas for these brownies or tried this brownie recipe, let me know and comment below!:)

Monday, May 13, 2013

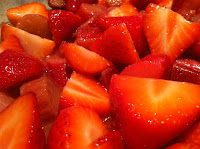
Flourless Strawberry-Rhubarb Crisp

Wow, time flies!  I apologize for it being so long since I wrote but, by the time I realized a couple weeks had passed!  But now that summer is quickly approaching, I have been finding new recipes to share with all of you.

This strawberry-rhubarb crisp was actually created on accident.  One day when trying to make a fruit cobbler I realized there was absolutely no flour in the house.  So, instead of running to the store I decided on trying to make up my own recipe for cobbler, but it turned into more of a crisp.  The good news is that you can use any kind of fruit that you have on hand or that you are in the mood for, I just happened to use strawberries and rhubarb.  This is the perfect summer dessert especially on those days that can be a scorcher.  It's not too heavy, is sweet, and pairs excellent with vanilla ice cream! 

Flourless Strawberry-Rhubarb Crisp
a LindsayRoseDessert Original 

Filling: 
2 cups strawberries, halved
1 1/2 cups rhubarb
1/2 cup sugar
1 tablespoon cornstarch

Crust:
2 cups oats
1 tsp vanilla
1/4 cup brown sugar
6 tablespoon softened butter, not melted

Preheat oven to 350 degrees.  Spray a pie pan or 8x8 square pan with nonstick cooking spray.

In a bowl, combine strawberries, rhubarb, sugar, and cornstarch.  Let sit until fruit is macerated and sugar is dissolved.

In a separate bowl, combine oats, vanilla, and brown sugar.  Cut butter into the oat mixture until crumbly.

Pour fruit mixture into prepared pan.  Sprinkle oat mixture on top of fruit.  Bake until juices from fruit start to bubble and oats become golden brown. 

Let cool and serve with whipped cream or vanilla ice cream:)

Wednesday, April 17, 2013

Monster Sugar Cookies

I have officially discovered the greatest thing about living in Florida (besides Disney World, of course). It is an amazing thing called the Cottage Food Law and I am so excited about it.  This law allows me to  bake certain foods from my home kitchen and sell them without having to get a bunch of licenses and permits.  I am officially open for business!  However, I, unfortunately, cannot do mail orders but, I can do deliveries!  So, if you would like one of my special treats just email me at lindsay0rose@gmail.com!

The very first recipe I am making to sell would be these delicious Monster Sugar Cookies.  I call them "monster" because they are HUGE!  I am so excited about these because not only are they the first baked item I will be selling but, they are deeeeeelicious!  Although I won't be sharing my cookie recipe, I will be giving great tips on how to make delicious, thick, and chewy cookies!  Hey now, this recipe took a lot of times to perfect, I can't just give it away!


Tips on creating you're own cookie recipe or how to make fantastic cookies:

1. Cream together the butter and sugar right from the start.
This means go ahead and beat together any fats (butter, shortening, etc.) together with the sugars until creamy.  This helps whip air into the batter.  If you cream the butter and sugar too much it will result in a thin and crumbly cookie however, if you cream the butter and sugar just enough it will result in a thicker cookie that will retain its shape.

2. Keep the butter cold before the cookies go into the oven.
This tip is helpful when wanting to keep the shape of your cookie and not have it spread too much.  This may seem confusing because most of the time butter needs to be softened when adding to a recipe.  This is true.  When you are done mixing all of the ingredients and you have scooped the cookie batter onto baking sheets put them in the freezer for 15-20 minutes.  This will make the butter harden up and resist the butter from melting, which will result in beautiful, thick cookies.

3. Always use fresh ingredients.
I know this seems obvious but, having the freshest ingredients is going to result in the best cookies.  Just like having the best quality ingredients will result in the best tasting cookies.  I have learned, from many times of messing up, that having baking soda and/or baking powder that is fresh is the key.  I like to replace my baking soda about once a month, which may seem like a lot, but that is how I know for sure my cookies will turn out right.

4. Once the flour is added, be careful of over-beating.
It is very easy to leave the mixer on and walk away.  But, after that flour has been added, I like to mix on low until just combined and then add my mix-ins with a rubber spatula.  This way I know I have not over mixed and the cookie will not become flat and greasy.


Monday, April 8, 2013

Strawberry Cheesecake Bites

If you have never been to a farmer's market, I highly recommend it.  This past weekend I headed over to my local farmer's market and what a wonderful thing it was.  Not only do they have some of the best fruits and vegetables, they also sell homemade jams, desserts, gourmet popsicles, and even pet items!  The best part of it all was dogs were allowed, so my sweet girl Carly had a blast.  I am literally obsessed with all of the great items that I bought.  Of course, one of those items being delicious, succulent strawberries!

When I got home from the farmer's market, I knew the strawberries needed to be used right away.  They were so ripe and sweet that I didn't want any to go to waste.  Instead of chopping them up or throwing them in some batter, I wanted to make sure these strawberries maintained form and still carried their sweetness.  What better way than to fill the strawberries with a cream cheese mousse?  These little guys are the perfect bite size dessert and taste just like a mini strawberry cheesecake (in less than 10 minutes)!

Here are some pictures of some of the great things I purchased:


Strawberry Cheesecake Bites
a LindsayRoseDessert Original

20 strawberries, tops cut off and hulled
4 oz softened cream cheese
3 tablespoons powdered sugar
1 tsp vanilla
1/2 tsp lemon juice
1/2 cup cool whip
1/8 cup graham cracker crumbs


With a handheld mixer, beat the softened cream cheese until smooth.  Beat in powdered sugar, vanilla, and lemon juice until combined.  Fold in the cool whip.

Take the hulled out strawberries and pipe with the cream cheese mixture.  Then, dip the top in graham cracker crumbs.

Place in the fridge for 10-15 minutes until set.

Enjoy!:)


Wednesday, April 3, 2013

Carrot Cake Cookies

Spring is fully upon us!  And I am very excited to be able to enjoy all of the wonderful things that come along with Spring.  One of those things being the delicious desserts that are especially wonderful this season.  I love lemon, orange, mint, and strawberry flavored desserts during this time but, one dessert that really reminds me of spring is carrot cake.

Instead of making the typical carrot cake with the typical frosted carrot on top, I wanted to do something a little different.  I call these little handheld cakes, or carrot cake cookies, they are delicious and everything you could every want in carrot cake.  They definitely didn't last longer than one day in my house!


Carrot Cake Cookies
a LindsayRoseDessert Original

1/2 cup softened butter
1/2 cup brown sugar
1/4 cup white sugar
1 egg
1 tsp vanilla
1 cup flour
1/2 tsp baking soda
1/2 tsp salt
1 tsp cinnamon
1/2 tsp nutmeg
1/4 tsp cloves
1 cup grated carrots
1/2 cup raisins
1/2 cup finely chopped nuts (pecans or walnuts)

Preheat oven to 350 degrees.

In a small bowl add in raisins and cover them with water.  Let sit for at least 15 minutes.  Drain.

In a mixer, on medium speed, cream together butter and sugars.  Beat in egg and vanilla.

In a separate bowl, whisk together flour, baking soda, salt, cinnamon, nutmeg, and cloves.  Slowly add in to butter mixture in 3 additions, beating well after each addition.

Mix in carrots, raisins, and nuts until all combined.

Using a cookie-scoop, drop onto parchment paper lined baking sheets and bake for 10-12 minutes or just until cookies are set.  Let cool completely.


Vanilla Bean Cream Cheese Frosting
adapted from Cat Cora's Cream Cheese Frosting

4 oz softened Cream Cheese
8 oz softened butter
3 cups powdered sugar
1/2 vanilla bean, split and seeds removed
1 tsp vanilla extract

Beat cream cheese and butter together until fluffy.  Beat in powdered sugar, vanilla bean seeds, and vanilla extract until frosting is at the right consistency.  Frost onto cooled cookies.


Sunday, March 24, 2013

Bananas Foster Cupcakes

First of all, let me just say, Happy Birthday to me! (and anyone else born on this glorious day)

Okay, now that I got that out of the way...

About a month ago I went to Food Truck Friday in Celebration, Florida.  For those of you who do not know what Food Truck Friday is, it is when select local food trucks come together in one area and you can go up to each food truck and order delicious food off of their menus.  Everything was AMAZING and I can't wait to go again.  Of course my favorite was The Yum Yum Cupcake truck.  They had the most delicious cupcakes I have ever tasted.  We ordered a dozen of all different kinds but, the one that stuck out the most was the banana one.  So, knowing me,  I wanted to try to make my own version of this delicious cupcake.  I don't know if theirs' was necessarily bananas foster but, it's exactly what it reminded me of.

This cupcake is extra special and that's why I am sharing this with you on my birthday.  It consists of a vanilla cupcake filled with a caramelized banana, banana pudding, and a meringue frosting.  However, my banana pudding recipe is top secret :x, but don't worry, your favorite banana pudding recipe or a boxed banana pudding mix will work just as great! Mmmmmm

Bananas Foster Cupcakes
a LindsayRoseDessert Original

Bananas Foster

1  large banana
2 Tablespoons butter
4 Tablespoons brown sugar
1/2 teaspoon cinnamon
1/2 teaspoon rum extract

Slice the banana to get about 12-14 slices.

In a skillet over medium heat, melt the butter and add the brown sugar and cinnamon.  Once the sugar is dissolved, add in the bananas and rum extract.  Cook until bananas are softened.  Take off the heat and let cool completely.


Vanilla Cupcakes

1 1/2 cups all-purpose flour
1 1/2 tsp baking powder
1/2 tsp salt
2/3 cup sugar
2 large eggs
1 stick of softened butter
2 tsp vanilla
1/2 cup milk

Preheat oven to 350 degrees.  Line the muffin tin with cupcake liners.

In a bowl, whisk together flour, baking powder and salt.  Set aside.

In a mixer, beat butter and sugar together until light and fluffy.  Add in eggs and vanilla and beat until combined.  On low speed, alternate the flour mixture 3 times with the milk mixture 2 times, starting and ending with the flour until all is combined.

Scoop about one tablespoon of the batter into the bottom of each cupcake liner or just enough to cover the bottom.  Place a banana from the bananas foster on top of the batter of each liner.  Use the rest of the batter to fill the liners and cover the banana.

Bake for 15-20 minutes or until toothpick inserted comes out clean.  Cool Completely.


Banana Pudding Recipe of your choice

Once the cupcakes are completely cool, cut out a small circle and dig a hole into each cupcake until just right above the cooked banana.  Spoon in the banana pudding and cover with the circle cut out of the cupcake.


Cinnamon Meringue Frosting

4 egg whites
1/3 cup sugar
1 teaspoon vanilla
1 teaspoon cinnamon

Beat the egg whites until soft peaks begin to form.  Slowly beat in sugar.  Beat in vanilla and cinnamon until stiff peaks form from the meringue.

Pipe onto cupcakes.

In a 350 degree oven, place the piped cupcakes back in the oven until the meringue is browned.

Wednesday, March 20, 2013

Vanilla Cupcakes with Chocolate Frosting

This is my most favorite type of cupcake.  Of course, I love fancy flavors that involve bananas, chocolate chip cookie dough, and creme fillings.  However, when we are talking simple, vanilla cake with chocolate frosting is my favorite.  And no, it can not be the other way around.  I just love the way it tastes, it's not too rich and not too filling so I can have as much or as many as I want.  Many of my friends and family have learned this is my favorite type of cake so on my birthday it's never a problem getting to eat it.  This year, I actually wanted to make it (not just eat it) and share it with you.

Not only are these a simple, basic cupcake but, they are incredibly easy to make!  Also, I bet you have all of the ingredients in your house!  That's how great these cupcakes are.  So, don't just make these in honor of my birthday, make them if you have a chocolate craving or if you just have a need for cupcakes.  As for the frosting, I'm pretty sure you have never tasted anything like it in your life!

And for my friends and family that wanted to make this for me on my birthday... I will still gladly accept :)


Vanilla Cupcakes with Chocolate Frosting
adapted from Food Network

1 1/2 cups all-purpose flour
1 1/2 tsp baking powder
1/2 tsp salt
2/3 cup sugar
2 large eggs
1 stick of softened butter
2 tsp vanilla 
1/2 cup milk

Preheat oven to 350 degrees. 

In a bowl, whisk together flour, baking powder and salt.  Set aside.

In a mixer, beat butter and sugar together until light and fluffy.  Add in eggs and vanilla and beat until combined.  On low speed, alternate the flour mixture 3 times with the milk mixture 2 times, starting and ending with the flour.  Once the flour is incorporated, scoop into lined muffin tins.  

Bake for 15-20 minutes, or until a toothpick inserted comes out clean.  Cool completely before frosting.

Chocolate Frosting

3 egg whites
1/4 cup sugar
pinch of salt
2 sticks of butter, softened, cut into pieces (1 cup)
3 oz of milk chocolate chips, melted
1 tablespoon unsweetened cocoa powder

In a heatproof bowl, whisk the egg whites, sugar, and salt continuously over a pot of simmering water until the sugar is dissolved and the temperature reaches 160 degrees.

Take off the heat, and beat the egg white mixture in a mixer until soft peaks form and they are still shiny.  On medium speed, beat in the butter a few tablespoons at a time.  Once all the butter is added and the mixture is smooth, beat in the melted chocolate and cocoa powder until combined.

Frost onto cooled cupcakes.


*For a richer frosting, use a tablespoon more of cocoa powder and semi-sweet chocolate chips